
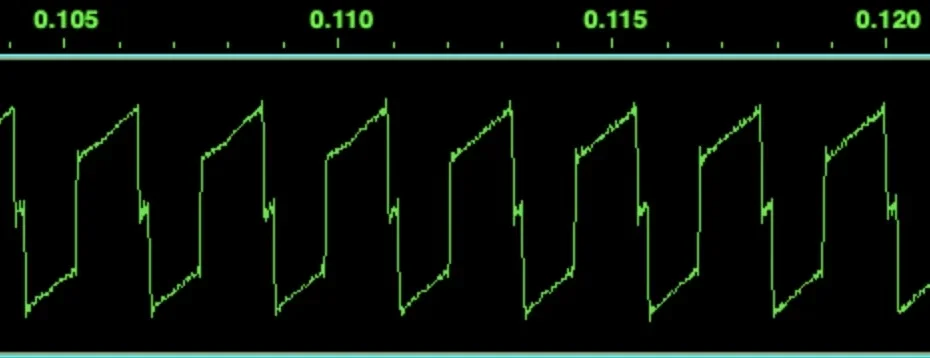
Goal: learn to set up clean, musical sidechain compression between the kick and bass to clarify the mix and control the pumping effect.
Sidechain compression makes a compressor on one track respond to another signal. Historically, the concept dates back to Douglas Shearer’s work on sibilance in the 1930s. Today, it is used for both corrective mixing and rhythmic sound design in electronic music.
In Ableton Live, the built-in compressor has a Sidechain button, an “Audio From” menu for choosing the trigger track, and a headphone icon for listening to the source. These tools help preserve the tone while giving the kick room to breathe.
This short article explains the principle, typical settings (threshold, ratio, attack, release), and common applications: ducking between kick and bass, ducking reverb, multiband sidechaining, ghost tracks, and creative uses.
For a complete tutorial with specific settings, see this practical guide illustrating the steps in Ableton.
Why sidechain the bass in Ableton Live?
Main benefit: making room for the kick when two sources share the same frequency range.
Frequency masking between the kick drum and bass reduces punch. EQ alone removes energy and can also make the low end sound thin.
Applying compression triggered by the kick turns down the bass during the kick’s transients. Two to three decibels of gain reduction is often enough to improve clarity.
There are two approaches: a subtle setting for clarity or a stronger effect that creates the familiar pumping sound of EDM and house music.
- Beyond bass: you can duck guitars, synths, or effects to give the lead vocal room to breathe.
- Learning tip: start with light gain reduction, then adjust the threshold and ratio to control the effect.
- Alternatives: gating and ducking can also give an element of the mix priority at the right moment.
Prerequisites, routing, and project preparation in Ableton Live
A successful rhythmic technique starts with clear routing and clearly named sources. First, organize your tracks: KICK SC, BASS SC, GHOST SC. Clear names help prevent routing mistakes while mixing.
Choosing the source
Choose the trigger track
You can select a dedicated kick track, a drum bus for an overall movement, or a ghost track with a silent pattern. Each option changes the character of the ducking.
Understand the signal path and the “Audio From” menu
Insert the compressor on the bass track, expand the sidechain section using the triangle, then enable it and choose the source in the “Audio From” menu.
Use the headphone icon to listen to the control signal and check that the correct element drives the technique. Move a ghost track slightly earlier if you want to preserve the kick’s transient.
| Source | Use | When to use it |
|---|---|---|
| Kick track | Direct triggering | Kick clarity |
| Drum bus | Overall movement | Rhythmic cohesion |
| Ghost track | Timing control | Rhythmic sound design |
Enable a high-pass filter on the sidechain input to prevent low frequencies from causing excessive triggering. Check the levels and listening mode in your DAW. Any third-party plugin follows the same routing principle.
“Clearly naming tracks and listening to the source prevents 80% of routing mistakes.”
To learn more, see an Ableton lesson and tips for setting up a home studio.
Sidechaining bass in Ableton: a step-by-step guide
Place Ableton’s compressor on the bass track and use the meter to check that a signal is reaching its input. Open the options panel with the triangle to display the sidechain section.
Enable the control and select the source
Enable the option, then choose the source in the “Audio From” menu (your kick track, for example). Use the headphone icon to listen to the control signal and confirm that the kick is driving the compression.
Practical settings: threshold, ratio, attack, release
Start with a moderate ratio (2:1) and lower the threshold until you see about 2 to 3 dB of gain reduction when the kick hits. Set a fast attack (around 2 ms) to catch the transient.
Choose a short release.
- Adjust the makeup gain to restore the perceived level.
- Save a “BASS SC – KICK” preset to save time.
Key settings: from subtle mixing to EDM “pumping”
Your choice of attack, ratio, and release determines whether the kick has room to breathe or the mix pulses. First, decide whether you want subtle processing or a pronounced effect. The settings vary considerably with your musical goal.
Subtle settings
Starting point: aim for 2 to 3 dB of gain reduction, a very short attack (around 2 ms), and a fast release to let the kick through without creating an audible effect.
Pronounced EDM effect
For clear pumping, use a high ratio (4:1 or more) and a low threshold. Matching the release to the tempo creates precise, repeatable movement.
Sync the release to the tempo
Useful formulas: quarter note = 60,000 / BPM ms; eighth note = quarter note / 2; half note = quarter note × 2. Use these values to align the release with the groove.
Filter the detector and choose the right tools
Set a high-pass filter around 100 Hz on the detector input to prevent low-frequency energy from triggering too much compression. Combine light corrective EQ with ducking for a balanced mix that retains its low end.
- When to lengthen the release: at slower tempos or with four-on-the-floor patterns that call for broader pumping.
- Useful plugins: Kickstart, ShaperBox, and LFO Tool offer synchronized curves if you prefer an envelope shape to a compressor.
- Watch the perceived volume and adjust makeup gain to compare at equal levels.
For specific settings and presets, consult a complete tutorial on practical sidechaining.
Going further: plugins, multiband processing, and creative techniques
To expand your workflow, explore tools that offer more control over the envelope, frequency, and tempo. These approaches go beyond a conventional compressor and help you reach the musical result you want more quickly.
Compressors and dedicated tools
Glue and Auto Filter provide access to their dedicated sections through the triangle. Glue suits a subtle corrective mode, while Auto Filter allows more creative processing synchronized to the tempo.
Useful third-party plugins
- Kickstart: quick curves for straightforward ducking.
- ShaperBox / VolumeShaper and LFO Tool: precise envelope shapes.
- Trackspacer: shapes the frequency spectrum in response to a reference signal.
Multiband processing, dynamic EQ, and effect ducking
Multiband sidechaining targets only the low frequencies (for example, 50 to 100 Hz) when the kick hits. A dynamic EQ provides targeted compression in a specific frequency range.
“Always listen to the release and the curve: they determine whether the effect remains musical.”
To keep your production consistent, create racks and presets. To explore sidechain compression further, follow examples with specific settings and use practical presets.
Troubleshooting: common mistakes and good practices
First, check your levels so they do not skew your judgment. Always compare at equal levels by compensating with the compressor’s gain control. This lets you assess what the sidechain or ducking actually contributes, without being influenced by a simple difference in perceived loudness.
Level management and compensation
Adjust the output volume (Makeup) after compression. Without compensation, you may prefer a louder version even if it is not better.
Attack, release, and unwanted pumping
An attack that is too short can crush transients and reduce the kick‘s punch. Conversely, a poorly timed release creates uneven movement or unmusical pumping.
- Compare at equal levels: adjust the output volume to judge the effect.
- Avoid an excessively fast attack that smothers essential transients.
- Match the release to the tempo: too long and the mix pumps excessively; too short and the pumping sounds jittery.
- Enable the high-pass filter option on the detector input to keep low frequencies from dominating the control signal.
- Check the source timing: a mistimed ghost track or kick changes the compressor’s action.
- Try different plugins or algorithms: every compressor responds differently.
- Be careful on a master or drum bus: excessive ducking affects the entire mix.
- Document and save your presets so you do not repeat the same mistakes from one article to the next.
Tip: filter the detector and try different ghost-track offsets to preserve the transient while controlling the ducking.
Uses and styles: from house to hip-hop
Each genre calls for its own strategy so the kick keeps its impact without smothering the other elements of the mix.
In house music, kick and bass create the groove: regular, rhythmic ducking produces a clear low end and four-on-the-floor movement. Daft Punk are a good example of this characteristic pumping.
Instrument pairs, vocals, and textures
In pop, let the vocal trigger sidechain compression on guitars and synths. The result is better intelligibility without aggressive EQ.
In hip-hop or lo-fi, you can use the kick and snare to duck vinyl noise so the underlying texture breathes with the drums. Flying Lotus and Amon Tobin illustrate more aggressive or experimental approaches.
- House/techno: kick and bass for a clear low end and steady movement.
- Pop: vocals control the instruments to improve clarity.
- Hip-hop / lo-fi: vinyl-noise ducking triggered by the kick and snare.
- Experimental: instruments control textures and effects to create unexpected rhythms.
- EDM: pronounced pumping, often made easier by dedicated plugins and tempo synchronization.
- Rock/indie: targeted processing of guitar high frequencies when the vocal enters.
- Workflow: save racks and macros for kick and bass, vocals and effects, and vinyl noise.
“Use the control signal as a creative tool: it can shape the style more than any EQ.”

For practical studio settings, read our article on sidechain compression and adapt the parameters to the genre.
Conclusion
Quick recap: put the compressor on the target track, enable its sidechain section, and select the source in the “Audio From” menu. Listen to the control track through the headphone button to check that the signal is correct.
Start with around 2 to 3 dB of gain reduction, then adjust the threshold, ratio, attack, and release. Sync the release to the tempo if you want rhythmic pumping.
Filter the detector input to avoid unnecessary pumping, and always compare at equal levels by adjusting makeup gain to judge the effect on volume.
In Ableton Live, the process is quick: save presets and racks, test different application modes (bass, vocals, effects), and record your settings. For technical details, consult the Live manual.
This short end-of-article guide should help you make your mixes more consistent while preserving their musicality.