
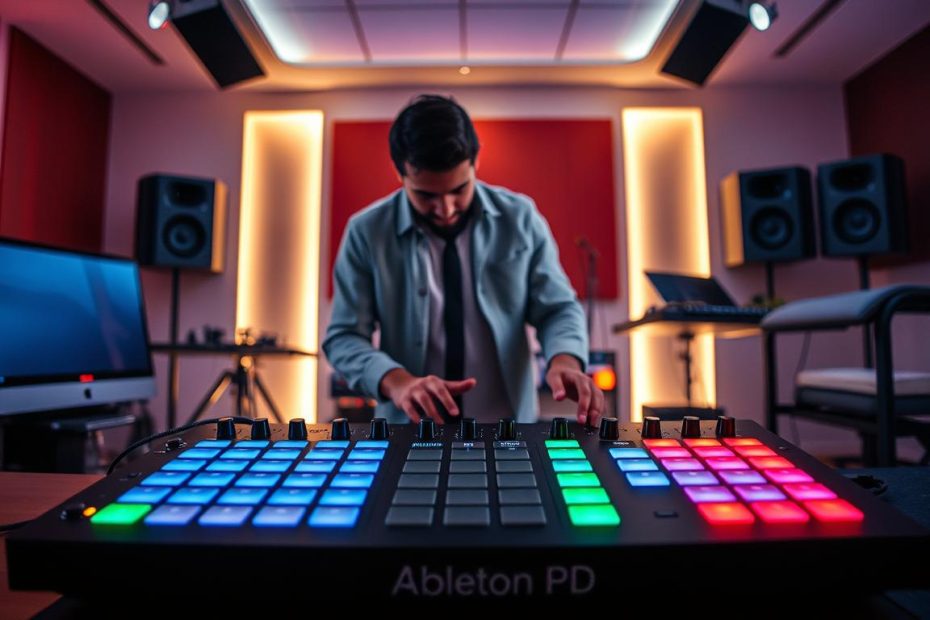
Push 2 changes the way you create. This controller gives you direct access to melodies, harmonies, rhythms and sounds. It lets you stay focused on creating instead of constantly turning to the screen.
Once the device is connected via USB, the software detects it automatically. No driver installation is required. Its modes adapt to the track and the context.
On stage or in the studio, real-time playing, step sequencing and clip launching make performance fluid and modern.
The encoders and built-in display speed up selection. You can quickly adjust effects, tracks and sounds. The controls change with the type of track to save you time.
This step-by-step guide takes you from setup to advanced techniques. Official resources and videos are available if you want to learn more.
Why Ableton Push 2 Turns Live Into a True Instrument Today
The physical interface brings your gestures closer to the sound. Creating clips directly in Session View means less time at the computer and more time playing.
Context-sensitive modes adapt their behavior to the track. Each session therefore suits the type of work you have chosen.
The touch-sensitive controls and high-resolution display show what matters. You can quickly choose a kit, quantization setting or loop length without interrupting your creative flow.
Practical benefits:
- A continuous workflow across composition, arrangement and real-time performance.
- Fewer technical obstacles, allowing you to stay in the moment and enjoy a more instrumental feel.
- Visual and hands-on guidance suited to the context, in the studio or on stage.
- A modular workflow: switch modes easily while retaining control of sounds, clips and effects.
In short, this control surface combines choice, feel and efficiency. Musicians gain confidence and speed at any skill level. To explore the software further, read why Live is a worthwhile choice.
Get Started: Setting Up and Updating Push 2
To get started, connect the power supply and USB cable to your computer. Turn on the device with the rear switch for a steady, orderly startup.
Connecting, powering and automatic detection
Connect the dedicated power supply, then plug the USB cable directly into a reliable computer port. Avoid unpowered hubs, which can make the connection unstable.
Live automatically detects the controller within a few seconds. You do not need to install a driver or open a preferences menu for initial detection.
Firmware updates and quick checks
Firmware updates are included with Live updates. The first time you launch Live after an update, the device may offer to update its firmware and guide you through the process on its display.
- Check that the pads light up and the display works.
- Test the encoders and the main buttons: Browse, Note and Session.
- Restart after an update if necessary to keep modes and functions stable.
Finally, make a quick check of latency and audio/MIDI monitoring. Handle the device with both hands to avoid dropping it, and keep the connectors clean. If you encounter a problem, consult the official help resources.
Browse and Load Sounds From Push 2 in Browse Mode
The built-in browser shows a visual hierarchy that speeds up searches through sound libraries and Collections. The display is divided into columns: categories or your Collections on the left, content in the center and preset details on the right.
Columns, arrow buttons and encoders
The eight encoders let you scroll precisely within each column. The arrow buttons provide step-by-step navigation.
The two buttons on the right let you move up or down the hierarchy. These actions are easy to remember on stage.
Preview, Load and navigating Collections
Turn on auditioning with the Preview button. To adjust its volume, hold Shift and turn the Master encoder.
The Load button loads the selected item. After loading, it changes to Load Next/Previous so you can try other presets without losing your place.
Suggested method
- Filter by category, then refine your selection with the encoders.
- Preview the sound, then confirm with Load.
- Use Load Next/Previous to try the next preset and keep your creative flow going.
| Function | Control | Benefit |
|---|---|---|
| Choose a category | Left column | Quick selection of Collections |
| Navigate quickly | Encoders and arrow buttons | Precise or faster scrolling |
| Preview | Preview button and Shift + Master | Instant auditioning and volume adjustment |
| Load | Load button | Quick testing with Load Next/Previous |
Create a New Track and Organize Its Clips for Live Performance
A well-prepared, armed track is the foundation of a reliable performance. Double-clicking a device in the browser immediately creates a new track. You can also select a track and press Enter to load a device without navigating a complex menu.
On a MIDI track, place MIDI effects first, followed by the instrument and then audio effects. The signal flows from left to right: follow this method to avoid surprises.
Arming the track enables monitoring through the chain. A MIDI track is often armed automatically when you insert an instrument. Arm it just before recording or playing in real time.
Prepare clips and synchronization
Name and color your clips so you can recognize them immediately. Set global quantization so they launch at the right moment and transitions stay in time.
- Suggested order: set the input mode → add devices → check audio/MIDI monitoring.
- Organize tracks by family, such as drums, basses and keyboards, to navigate faster.
- Use a template Set and check levels quickly before going on stage.
Simple, repeatable routines help you stay in control of your set. As you repeat these steps, the gestures become automatic and the show stays under control.
Understand Tracks, Instruments and Effects in Live for Clear Routing
A well-organized device chain prevents most unwanted sonic surprises. On a MIDI track, the signal flows from left to right: MIDI effects first, then the instrument, then the audio effects that shape the final sound.
Device chains and order
The order of effects changes the result. Try different positions to find the best use for each effect. Devices can be collapsed and reordered easily, letting you experiment without losing the organization of your set.
Level indicators, CPU and good practices
The level indicators between devices help you spot a signal that is too quiet or too loud. Leave headroom before the physical output to avoid clipping.
- Disable demanding devices or freeze the track to reduce CPU load.
- Use Racks to group and control complex chains. See the section on instrument racks to create reusable groups.
- Keep level management simple: check each stage before the final effect.
Tip: try pre/post-instrument routing and parallel inserts to broaden your palette without overloading the main chain.
Ableton Push 2: Turn Live Into a True Instrument
During a performance, every button and pad behaves like a key in an expressive instrument.
Adopt a mindset that favors playing in real time over navigating menus. Modes determine which controls are available: memorize a few key buttons to save time on stage.
Bring together essential functions such as Browse, Note, Session, Quantize and Record, and make them second nature. This method reduces setup time and quickly improves your skill.
Balance structure with improvisation: prepare color-coded clips, then leave room for spontaneous playing. With just a few gestures, you can adjust a kit, replace a preset or extend a loop.
“The display’s visual feedback guides decisions without interrupting the musical flow.”
- Memorizing four to six key buttons makes transitions easier.
- Pad colors provide quick visual cues.
- Rehearsing under stage conditions reinforces your skills and preserves your musical intent.
Drum Rack on Push 2: Load Kits and Play in Real Time
Browse the Drums library, load a preset and get immediate access to playable sounds.
Activate Note mode so each MIDI pad corresponds to a Drum Rack slot. The pad assignments on the 8 × 8 grid depend on the state of the Layout button.
The Layout button switches between the loop selector, 16 Velocities mode and 64 Pads mode. Each layout changes how you play and select elements in real time.
Pad colors indicate whether a sound is present, playing, selected, soloed or muted. This lets you identify a pad’s status quickly and play with greater confidence on stage.
To manage large kits, use the touch strip or Octave Up/Down, holding Shift to move by one row. This gives you access to several banks without interrupting the groove.
- Practical example: select the kick pad, then try a clap or shaker without stopping the loop.
- Adjust playing sensitivity to suit the velocity range you want.
- Use the display’s encoders to refine an instrument or kit parameter.
| Action | Control | Benefit |
|---|---|---|
| Load a kit | Browse → Drums → Load | Sounds ready to play immediately |
| Change layout | Layout button | Adapt how you play in real time |
| Navigate large kits | Touch strip and Octave buttons | Quick access to additional pads |
Everything happens quickly, helping you maintain the energy of your set.
Pad Layouts: Loop Selector, 16 Velocities and 64 Pads
Three layouts organize your playing: the loop selector, 16 Velocities mode and 64 Pads mode. Each meets a particular need on stage or in the studio.
Switch with the Layout button and explore the 8 × 8 grid
Pressing the Layout button cycles through the three layouts. The loop selector lets you play, program steps and adjust a clip’s length in the same view.
16 Velocities mode lets you set velocity quickly and shape the rhythmic feel. 64 Pads mode opens up the entire 8 × 8 grid for playing across a wider range and reaching more banks.
Touch strip, Octave Up/Down and large banks
The touch strip and Octave Up/Down controls move the selection in banks of 16 pads. Hold Shift while using the strip to move by just one row for precise navigation.
- Practical tip: hold Layout for temporary access to loop-length controls.
- Locking: Shift + Layout can lock those controls in place for steady operation.
- Memorize the gesture so you can quickly return to the 16 pads you want if the display does not follow.
Playing a programmed step-sequenced fill and then switching to hands-on playing across 64 pads is a good way to alternate between structure and improvisation.
Mastering the layouts is essential for saving time on stage. Practicing transitions between modes makes playing smoother and performances more reliable.
Program Beats Step by Step With Precision
Programming a pattern step by step lets you shape a precise, responsive groove. By default, each sequencer pad represents a sixteenth note. The clip starts automatically as soon as you place a step, and playback is shown visually to help you stay in time.
Step size, Scene/Grid buttons and colors
Use the Scene/Grid buttons to change the resolution from sixteenth notes to finer divisions. Match the step size to the rhythmic complexity.
Colors show the state of each step: empty, a note whose brightness reflects its velocity, a muted step, or two unlit columns for triplets. This visual code speeds up selection and on-stage use.
Delete, Mute/Solo, microtiming and automation
Use Delete to remove a step, a whole pad or the entire pattern. Mute/Solo controls act on steps so you can quickly test variations and simplify an arrangement.
Refine each note’s dynamics and microtiming to make the groove feel more human. Add automation to effect parameters so the pattern evolves without changing its foundation.
- Build gradually: kick → snare → hi-hats → percussion → embellishments.
- Save clip variations to alternate between sections: intro, drop and fill.
- Alternate sequencing with live playing to enrich a single pattern while maintaining a high degree of precision.
“Consistent visual cues help you keep the beat, even at high tempos.”
Real-Time Recording, Overdub and Clip Management
Starting a live take calls for a clear method that supports precision and creativity. Turn on the metronome for a reliable click on each track. Quickly adjust its volume with Shift + Master so you can hear the tempo without drowning out the mix.
Record, Overdub and visual cues
The same Record button starts and stops recording. Press it a third time to enable Overdub and layer MIDI or audio. This mode simplifies the sequence: record → play → overdub, without changing controllers.
If count-in is enabled, a countdown bar appears and flashes at the tempo. It provides a visual cue for a confident start and helps you keep time.
The New button and clip management
The New button stops the active clip and immediately prepares a new one. By default, it duplicates playing clips into a new scene; you can change this behavior in the Setup menu.
Organize your clips: duplicate, rename and color them for fast navigation on stage. Visual cues make selection easier, speed up transitions and reduce mistakes.
- Try Overdub with small additions, such as ghost notes or subtle variations.
- Record a basic pattern first, then build it up with percussion layers.
- Use gentle quantization after the take to preserve its natural dynamics.
“A well-adjusted headphone mix lets you hear every detail and refine layers without guesswork.”
Finally, check your headphone monitoring before every take. This helps prevent failed recordings and keeps overdubs clean, even when the energy rises on stage. These simple habits make real-time recording reliable and musical.
Fixed Length, Repeat and Swing for Solid Grooves
Setting a clip’s length before recording makes live playing easier. It gives you regular loops that are easy to chain together and synchronize with other tracks.
Fixed Length and Phrase Sync for clean loops
Hold the Fixed Length button to select the exact length of a new clip. This function gives the clip a predetermined length and prevents recordings from running too long.
With Phrase Sync, the length follows a musical phrase: recording starts at the right bar even if the trigger comes late. This is ideal for keeping time and maintaining consistent sections.
Finger-controlled Repeat, rate and the Swing encoder
Turn on Repeat to play or record notes at regular intervals. Set the rate with the Scene/Grid buttons to vary rhythmic density.
The Swing encoder changes the placement of repeated notes. The display shows the swing amount when you touch it, helping you find the right balance between regularity and groove.
- Combine Fixed Length and Repeat to sketch a stable pattern quickly.
- Gradually add embellishments with Repeat to enrich the pattern without crowding it.
- Always check that loop lengths fit the sections of your set before going on stage.
| Action | Control | Benefit |
|---|---|---|
| Fixed Length | Hold the Fixed Length button | Regular loops and reliable transitions |
| Phrase Sync | Enable Phrase Sync | Entry aligned with the musical phrase |
| Repeat and Swing | Repeat button and Swing encoder | Controlled rolls and hi-hats with swing |
Listen critically: test the swing through headphones and the main speakers to judge its effect on the mix. Too much swing obscures the pulse; too little makes it sound mechanical.
To learn more about audio effects useful for rhythmic routing, consult the audio effects reference.
Accent, Dynamics and Expressive Pad Playing
Knowing how to use accents immediately makes a pattern more lively. The Accent button sets every played note to the maximum velocity of 127.
A short press toggles the effect on or off; holding the button keeps it active only while it is pressed. This control is useful for powerful bursts or emphatic entries.
In 16 Velocities mode, the 16 pads at the lower right represent different velocity levels. Place a step at the level you want to give attacks a clear hierarchy.
- Key difference: natural velocity changes with your touch; Accent forces the maximum to emphasize a beat.
- Exercise: play a pattern at three different levels to hear their effect on the rhythm.
- Practical example: accent the snare beats to anchor the groove.
Alternate Accent with varied dynamics to create breathing room and stronger entries. The selection of the active pad determines the instrument’s response.
“Expressive control takes regular practice, but it turns an adequate pattern into a lively one.”
One final tip: adjust the instrument’s velocity curves if its response is too abrupt or too weak. A little practice will make your playing more natural and musical over time.
Edit a Drum Rack: Load or Replace a Pad, Copy, Transpose and Choose Colors
Managing a pad without triggering its sound lets you adjust your set without losing momentum. In Device mode, press the pad and then the square button below the display to select it. Return to Browse mode to load or replace the intended sample.
To edit a pad silently, hold Select and press it: the selection happens without triggering a note. This is ideal during a performance.
Selecting, quick testing and duplication
After loading, the Load button becomes Load Next/Previous, letting you test variations quickly in the context of the song.
Use Duplicate to copy a pad to another slot: existing notes stay in place. This lets you create pitch or filter variations without rebuilding the kit.
Choke groups, transposition and colors
- Assign a pad to a choke group to prevent sounds such as open and closed hi-hats from overlapping.
- To transpose a pad, use the encoder: adjust a tom or percussion sound’s pitch in a few turns.
- Customize a pad’s color with Shift + press: color-code kicks, snares and hi-hats. These colors are saved with the Set and make on-stage navigation easier.
Practical tip: prepare replacement pads, such as alternate snares, for fills. Keep them close at hand with Duplicate and use silent selection to switch without mistakes.
“Organizing pads and their colors before the set reduces mistakes and speeds up transitions.”
| Action | Control | Benefit | |
|---|---|---|---|
| Select without triggering | Select + pad | Silent editing during a performance | High |
| Replace a pad | Device mode → square icon → Browse → Load | Change one sound without altering the rest of the kit | Medium |
| Try variations | Load Next/Previous | Quick auditioning in context | Medium |
| Copy a pad | Duplicate | Create variations without rebuilding the kit | Low |
| Choke group | Assignment in Drum Rack | Prevents unwanted overlap | High |
For more on managing racks and sounds, read the documentation on Instrument and Drum Racks.
Manage Instruments, Effects and Racks: Drag, Reorder and Disable
Dragging a device from the browser onto a track remains the quickest way to test a sound. Dragging an instrument or effect into Device View builds the chain immediately and lets you hear what it does at that point in the mix.
You can insert devices by double-clicking, pressing Enter or dragging and dropping. Reorder an effect or move a device from one track to another to reuse a proven setup.
Racks, macros and workflow
Instrument and Effect Racks group chains and provide macro controls. Assign macros to control several parameters at once and transform a sound with one gesture.
- Disabling a device bypasses it and reduces CPU load without losing its settings.
- Dropping a sample onto a MIDI track creates a Simpler, a quick starting point for building an instrument.
- Give macros clear names so you can find them quickly on stage.
Choose Racks for broad control or individual devices for precise adjustments, depending on your needs. Save your chains as presets to speed up future projects and find your instrument racks in the library.
“Reorganizing and naming your macros avoids guesswork and keeps creative momentum going.”
Presets, Defaults and Hot-Swapping to Work Faster
To save time on stage, keep your sounds and chains close at hand. Saving a preset stores all the settings of an instrument or effects chain with the Save Preset button. The presets then appear in the browser for immediate access.
Save presets and create Defaults
Create and name a preset to reuse a complete chain. First group the devices in a Rack, then save it to keep all their settings together.
Defaults replace a track’s generic settings. You can define On Drum Rack or On Track View behavior so a track opens with your preferred instruments and effects.
Hot-Swap mode [Q] and instant auditioning
Hot-Swap mode links the browser to the selected device. Press [Q] to audition a preset without interrupting your playing time.
Project-specific presets are found in the project’s Defaults folder. You can also drag a device into the library to organize your choices by family and use.
| Action | Control | Benefit |
|---|---|---|
| Save Preset | Save Preset button | Quick reuse |
| Project Defaults | Defaults folder | Project-specific behavior |
| Hot-Swap | [Q] key or dedicated button | Instant auditioning without interrupting play |
“Well-organized presets and Defaults reduce extra steps and preserve creative energy.”
Use VST/AU Plug-ins With Push 2 in Live
To recognize plug-ins, enable them in Preferences and rescan if necessary. Enable VST2, VST3 and Audio Units sources as appropriate for your system so they appear in the browser.
Activation, formats and placement
In the Preferences menu, enable the VST and AU folders, then use the Rescan button to scan again without restarting the computer. Live supports VST2, VST3 from version 10.1 onward, and AU 2/3 on macOS.
Place VST/AU instruments on MIDI tracks. Place effects after an instrument or on an audio track for clear routing.
Compatibility and good practices
On an Intel Mac, do not try to run PowerPC plug-ins directly: plan for replacements or compatibility software. Some AU presets appear only after inserting the plug-in and enabling Hot-Swap.
- Organize plug-ins in favorite browser folders to save time.
- Browse and load quickly with the keyboard: arrow keys and Enter.
- Test stability and latency under real conditions before adding plug-ins to your set.
| Action | Control | Benefit |
|---|---|---|
| Enable sources | Preferences → Plug-ins | Visibility in the browser |
| Rescan | Rescan button | Add plug-ins without restarting |
| Insert and assign | Drag → assign a macro | Reusable method |
A simple, stable set is better than a collection of untested plug-ins.
Learn and Progress in France: Certified Courses, Methods and Funding
Taking suitable training helps you progress quickly and develop reliable habits for the stage and studio. Courses combine demonstrations, videos and practical exercises to reinforce useful techniques.
Certified trainers, free lessons and community
Certified trainers offer modules with free lessons so you can explore the material and learn more before committing. Groups, feedback and shared experience make the community a real source of help and speed up progress.
Possible funding: AFDAS, AIF, AGEFICE and FIFPL
Depending on your circumstances, funding may be available through AFDAS, AIF, AGEFICE or FIFPL. Checking eligibility in advance makes applications and learning plans easier to manage.
- Recommended method: combine videos with practical exercises to develop automatic habits.
- Suggested path: basics, playing modes, racks and routing, followed by guided creation of a complete set.
- Choose a course with measurable goals and personalized help from a mentor.
Consult the information pages to learn more and start the funding application process.
Conclusion
Ultimately, the controller supports a creative process centered on touch and timing. It becomes a true instrument that brings together playing, sequencing and clip launching so you can complete a set with confidence.
Browse mode, Preview auditioning and Load Next/Previous speed up sound selection. To save time on stage, also master the pad layouts: loop selector, 16 Velocities mode and 64 Pads mode.
Pay attention to the order of your tracks: MIDI effects → instrument → audio effects. Dragging, reordering or disabling a device lets you shape the sound without adding unnecessary CPU load and prepare a new track that is ready to play.
Strengthen your groove with Fixed Length, Phrase Sync, Repeat, Swing and Quantize. These techniques stabilize the rhythm and provide a reliable foundation for improvisation.
Explore VST/AU plug-ins to expand your palette, but test their stability in live conditions. Finally, practice regularly, organize your set and consult official videos or certified training to learn more and play with confidence.