
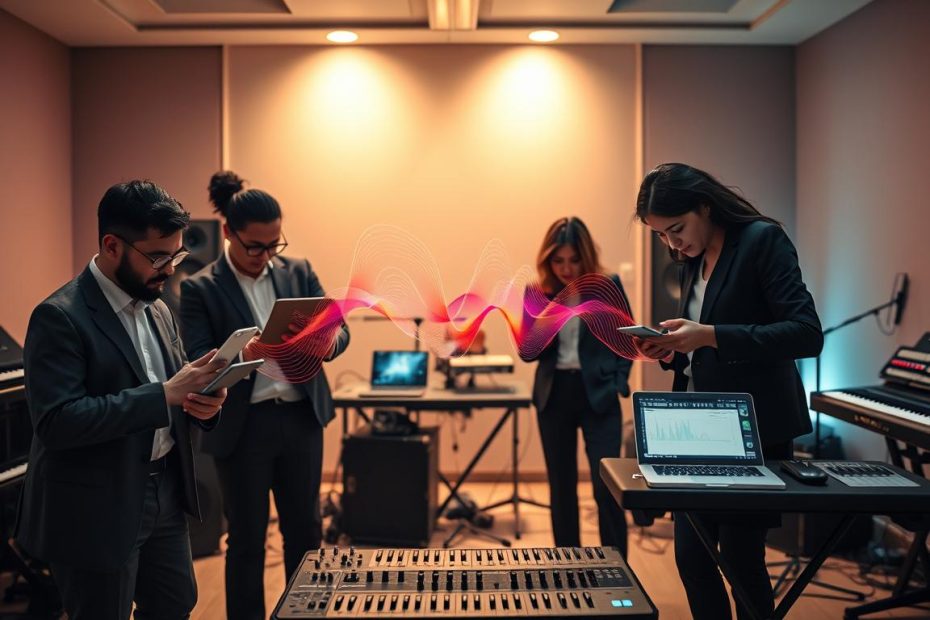
Guide objective: learn to use Ableton Link for reliable synchronization between multiple devices and applications on the same network, both live and in the studio.
The basic principle: a shared timeline automatically aligns tempo, phase, and bars across all participants. Each application can start and stop independently without disrupting the session, making it easier to play together.
Basic setup takes place in Live’s or the iOS applications’ Link/Tempo/MIDI settings. The Link button and Start/Stop Sync option provide visible controls before playback.
On macOS, Logic Pro supports this technology and displays a phase progress bar and participant count. For more about its integration with Logic Pro, see the official guide.
Understanding Ableton Link and this guide’s objective
This system creates a shared timeline that aligns tempo, phase, and bars across compatible software and applications on the same network. There is no master-slave relationship: each participant can change the tempo, start, stop, or leave without disrupting the session.
The principle is simple: applications on the same network detect one another and align automatically. The session view shows the number of participants in Live through the Link switch, and in Logic Pro through the phase progress bar.
This flexibility makes group playing, rehearsals, and live performances easier. Each device retains control of its own transport, allowing coordinated but independent entrances and exits.
Link is designed to remain stable even with complex network setups. Its “last tempo change wins” rule manages adjustments in real time.
- Guide objective: provide a practical method for running jams and collaborative workflows.
- Next steps: network requirements, compatibility, and detailed setup in Live.
| Element | What it does | Visible indicator |
|---|---|---|
| Tempo and phase | Continuous alignment between applications | Progress bar and counter |
| Transport control | Start and stop without interrupting the session | Independent for each device |
| Participation | Join and leave freely | Participant count displayed |
| Robustness | Stability in sessions involving multiple devices | Reliability on a local network |
Prepare the network and devices before the session
Simple network preparation helps prevent timing drift and interruptions during the session. Start by choosing the connection type that suits your situation.
Choose between Wi-Fi, Ethernet, and an ad hoc network
Use Wi-Fi for mobility, Ethernet for very low latency, or an ad hoc network if no router is available.
Check application and device compatibility
Confirm that each application supports the synchronization technology and that its version is up to date.
- Check that all devices are on the same local network and subnet.
- Set up a dedicated SSID, a strong password, and a less congested Wi-Fi channel.
- In Live, open the Link/Tempo/MIDI preferences and enable Show Link Toggle to prepare the control.
- Arrange a reliable power supply, a spare Ethernet cable, and a record of your settings.
| Option | Advantage | When to use it |
|---|---|---|
| Wi-Fi | Mobility and simplicity | Small mobile sessions or rehearsals |
| Ethernet | Stability and minimal latency | Professional live performances and fixed installations |
| Ad hoc network | Connection without a router | Emergencies or venues without a network |
Set up Ableton Live for Link step by step
Start by opening Live’s preferences to enable the Link control and prepare the session.
Open preferences and show the button
Go to Preferences > Link/Tempo/MIDI and select “Show Link Toggle.” The switch appears in the control bar.
Enable Start/Stop Sync and control playback
Enable Start/Stop Sync if you want to synchronize play and stop commands between compatible applications.
“Playback waits for the quantization interval to finish: the progress bar must fill before playback starts on the beat.”
Read the connection indicators
When Link is active, check the counter showing the number of other instances detected on the network.
If at least one other application is connected, Arrangement View shows a progress bar. Live waits for it to fill before starting playback, ensuring rhythmic alignment.
- Turn Link on and off to observe how the transport behaves.
- The first application sets the initial tempo; subsequent changes follow the most recent adjustment.
- Save a standard setup to save time.
| Action | Result | Visual indicator |
|---|---|---|
| Show the button | Switch available | Control bar |
| Enable Start/Stop Sync | Shared transport | Play and stop commands synchronized |
| Check the counter | Connections visible | Number of instances |
For detailed documentation on how it works and its advanced options, see the official manual: Synchronizing with Link, Tempo Follower, and MIDI.
Join, control, and leave a session on the network
To join a network session, enable the control in your digital audio workstation: your device connects automatically if a session exists.
In Live, enabling Link lets you join the session within seconds. The Link indicator shows the number of detected instances and provides a clear view of the network’s status.
Join a session and count participants
Watch the counter to see how many other applications are connected at any time.
In Logic Pro, enable the Sync button to see the phase bar and participant count.
Start or leave without disrupting the group
Your transport remains local: you can start or stop playback without affecting the shared tempo.
Enable Start/Stop Sync if you want shared control. Leaving the session with the same button does not interrupt the other devices.
- Explain the starting rules to the group to avoid conflicts.
- Test starts between beats: the system waits for the next quantization point.
“Each application remains independent while staying aligned to the same tempo.”
Manage tempo, phase, and bars in real time
Which tempo change takes precedence?
In a Link session, the first participant sets the initial tempo. After that, any participant can change it. If changes occur at the same time, the most recent adjustment takes precedence across the session.
Understand the phase progress bar before playback
Arrangement View displays a progress bar when playback is stopped. This bar represents the global quantization interval.
Live waits for it to fill before starting playback. This helps ensure precise starts despite variations in network latency.

Any tempo change from the session overrides the effect of tempo automation in Live.
The metronome no longer provides a recording count-in while a Link session is active. Prepare other quantized cues, such as clips or triggers.
“The last tempo change wins; coordinate adjustments to avoid surprises during a performance.”
- Choose a designated person or team procedure to coordinate changes in real time.
- Set an appropriate quantization interval of one or two bars to balance responsiveness and accuracy.
- Document the procedure for adjusting tempo during a set.
- In Logic Pro, reactivate the tempo track if you need to set the project tempo without disrupting the session.
| Situation | Immediate effect | Recommended action |
|---|---|---|
| Simultaneous changes | The most recent adjustment takes precedence | Appoint someone to coordinate changes or agree before applying one |
| Active progress bar | Playback waits until the bar fills | Wait for the bar to fill for precise starts |
| Tempo automation in Live | Overridden by session tempo changes | Use clips or notes to mark changes |
| Metronome and count-in | Count-in unavailable during the session | Use quantized visual or audio cues |
Ableton Link: Easily synchronize multiple devices
This technology quickly aligns tempo, phase, and bars across every device on the network.
Main advantages: tempo alignment without MIDI cabling, shared phase cues, and coordinated playback across multiple applications.
Independence: each participant retains local transport control. The Start/Stop Sync option also allows shared control when needed.
Using it is simple: enable the button and check the settings to join the session. The view displays a progress bar and participant counter in Live and Logic Pro.
- Scalability: the technology works for duos and larger ensembles alike.
- Robustness: a temporary disconnection does not stop the other devices.
- Procedure: decide who adjusts the tempo to avoid conflicts.
“Check the Link indicators, quantization, and perceived latency before the set for precise starts.”
| Benefit | Impact | Recommended action |
|---|---|---|
| Tempo and phase alignment | Precise starts and transitions | Enable the button and Start/Stop Sync if needed |
| Visual indicators | Easy participant monitoring | Watch the counter and phase bar |
| Cross-platform compatibility | Possible to combine macOS, iOS, and Live | Update applications and test them before the set |
For detailed training on using Link in performance, see this practical module: Link tutorial for live performances.
Alternatives and complements: MIDI, timecode, and Tempo Follower
This section covers methods that do not rely on the network and explains how to combine them with your workstation.
MIDI clock and SPP synchronization
MIDI clock sends tempo-related pulses and can include Song Position Pointer (SPP) messages to align an external sequencer.
Live can be configured as a clock source or receiver, depending on your setup.
MIDI timecode and clock: limitations and uses
MIDI timecode provides absolute SMPTE-style time, useful in video post-production. It does not follow tempo changes, and Live can only receive synchronization in this mode.
Choose clock for musical tempo and timecode for a time reference tied to picture.
Tempo Follower: follow a drummer or turntables
Tempo Follower analyzes an incoming audio signal to follow a drummer or turntables. Enable the Follow button and select the input channel in the Link/Tempo/MIDI preferences.
Note: Follow makes Link and external synchronization unavailable, but Live can still send MIDI clock to hardware.
USB/MIDI and integration with other applications
Enable synchronization destinations and sources in the settings to connect external instruments and effects via USB/MIDI. SPP remains useful for obtaining an accurate position when recording.
“Use clock for tempo, timecode for video, and Follow to drive the set from an audio source.”
- Example: a DJ controls the set’s tempo with turntables.
- Example: an acoustic drummer drives synchronized sequences and effects.
- Tip: check latency before recording and enable compensation for each device.
Cross-platform compatibility: Live, iOS, and Logic Pro
On macOS, Logic Pro offers direct integration that simplifies tempo and phase synchronization.
Enable it in Logic Pro: right-click the Sync button in the control bar and choose Ableton Link to join the session on the local network.
Align tempo, phase, and beats on macOS
Once enabled, the software automatically aligns tempo, beats, and phase. The LCD displays a circular progress bar and the participant count.
This provides a clear view of the shared position and helps prevent noticeable offsets during playback.
Start/Stop Sync and tempo-track management
If Start/Stop Sync is enabled in the settings, start and stop commands can be shared between applications.
When Logic follows the session, the tempo track becomes inactive (blue): your local changes remain on hold until you reactivate it.
You can reactivate the track to impose a change. An external adjustment may deactivate it again.
- iOS compatibility: applications on iPhone and iPad join the same session and follow its phase.
- Joining and leaving: either action leaves the other devices playing.
- Tip: test an ad hoc or Wi-Fi network for stability, and validate the session with multiple applications before a concert.
Check the participant indicator and phase with a coordinated playback test to ensure reliable control during a live performance.
Troubleshooting, latency, and network good practices
A simple test with percussion quickly reveals the source of a timing offset.
Latency compensation: use each MIDI device’s sync-delay controls to compensate for transmission delays.
Play percussive patterns in parallel and adjust the delay until the hits line up.
Control status: when the Link button is enabled, Live can send MIDI clock but cannot receive it. The external synchronization button (EXT) is then disabled.
When Tempo Follower is active, Link and EXT are disabled, but the software can still send MIDI clock.
“Always test under real conditions and document your settings so you can return to a reliable setup.”
- Diagnose offsets with percussive patterns and adjust the delay for each device.
- Document the basic settings for each instrument and interface.
- Check network settings: Wi-Fi channel, interference, and signal strength.
- Account for effects and plugins that add latency.
- Schedule configuration changes outside critical passages and keep a spare Ethernet cable.
- If problems persist, consult the Link FAQ for help.
| Problem | Likely cause | Quick action |
|---|---|---|
| Rhythmic offset | MIDI or plugin delay | Align hits with percussive patterns and each device’s delay setting |
| Devices no longer detected | Network interference | Change channels or switch to a wired connection |
| EXT disabled | Link or Follow active | Turn off Link or Follow to receive clock |
Conclusion
This solution’s strength is its stability: Ableton Link provides a simple network framework for aligning tempo, phase, and bars between devices and software.
Managing tempo in real time requires clear rules: decide who handles changes and test starts before playing.
The view, counter, and button let you check the session’s status quickly. After checking the connection and devices, enable Ableton Link, adjust quantization, and run a test.
Limit instruments and effects to reduce CPU load. Send MIDI clock to hardware if needed, and prepare cues for recording.
Create network presets and define baseline settings. Monitor the connection, check settings regularly, and seek help if unexpected tempo changes or synchronization problems occur.